Wirecutter, a New York Times company, has spent hours testing laundry products and you’ll see I reference them when they’ve reviewed products I recommend.
The Machinery
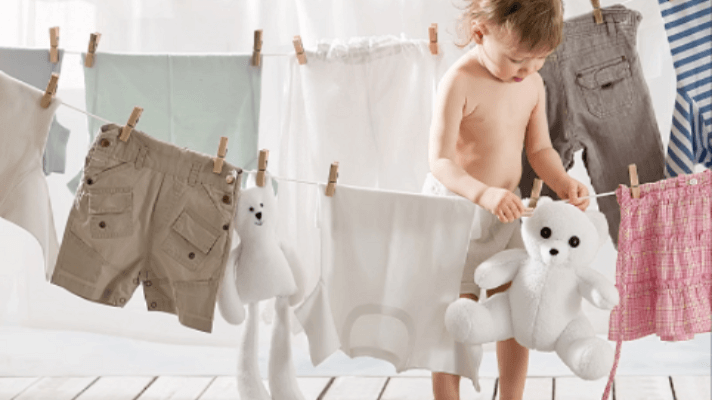
Washers and dryers — and how they work — can vary a lot, but knowing a few general rules can help you put them to best use.

Mastering the Settings
There are three functions — cycle length, cycle speed and water temperature — that can help you better understand washer settings and the effect they have on your launderables. Note, though, that on some machines these functions are separate of one another, allowing for greater control and customization of your wash, while in other machines cycle length, speed and water temperature settings are linked.
The cycle length (sometimes just called “timer”) is how long the machine will clean your clothes. Use shorter cycles for less soiled and delicate clothing, and longer cycles for heavily soiled and bulky items. Always opt for the shortest possible cycle to get the job done; the less time garments spend being spun around in the wash, the longer they’ll last.
The cycle speed refers to the speed and force at which clothes are agitated in the wash and spin cycles. Cycle speeds are sometimes expressed using terms like “regular,” “permanent press” or “delicate.” Those roughly translate to: “fast/fast,” “fast/slow,” or “slow/slow.”A regular cycle in which both the wash cycle, when water and detergent are introduced into the drum, and the spin cycle, which extrudes water from the clothes post-rinsing, are fast. This is the right choice for bulky items.Permanent press is a fast/slow cycle, meaning that the wash cycle is fast and the spin cycle is slow, making it a good choice for fabrics that are prone to wrinkling, as the slower spin cycle reduces wrinkles. This is the right choice for the majority of your laundry.The delicate cycle is a slow/slow cycle, and the one that should be used for fine or delicate fabrics, or items with embellishments.Then there’s water temperature. When it comes to selecting the right water temperature for a load of laundry, keep these three things in mind:
- Because of advances in detergent formulation and washing machine design, virtually all laundry can now be washed using cold water. Cold water offers two benefits: It conserves energy, which can save you money, and it is less taxing on textiles, so it can extend the lifespan of everything from your favorite jeans to those expensive sheets you splurged on.
- It can still be helpful to know the outmoded rules of laundry water temperature selection: Cold water for darks, hot water for whites and heavily soiled items, like diapers. Hot water will have a fading effect over time, which is why cold water was historically recommended for darks and bright colors. (Older detergent formulas didn’t dissolve as well in cold water, which was why hot water was suggested for white and light-colored laundry.) Hot water also can offer extra cleaning power, and therefore was considered ideal for especially dirty laundry, including items like pillowcases that have been slept on by a sick person.
- When in doubt, use cold water.
But maybe you’ve been using hot water on your whites for as long as you’ve done laundry, and old habits die hard. Or perhaps you’re still worried about germs and bacteria surviving in the cold? By all means, continue to use hot water! If washing towels in hot water makes you feel better even though they’ll come out just as clean even using cold water, go for it. (For the record, the heat from the dryer will take care of the germs.) That’s exactly what I do, despite knowing it’s just a psychological comfort rather than a fact-based decision. Laundry is personal, and we needn’t all make the same choices or have the same feelings.
Mastering the Dryer Settings
You’re probably guilty of over-drying your laundry. This can result in fading, shrinking, fraying or worse. But if you can break that habit, your clothing will thank you by lasting longer.
But don’t internalize that dryer guilt: The problem with over-drying rests with the way dryer settings are labeled, rather than with your laundry skills. So go on and blame the machine. Then review this breakdown of what the most common dryer settings actually mean so you can make better and more informed dryer choices, setting labels be damned.
Regular: The highest heat setting, best used only for heavy items like jeans, sweatshirts and towels. “Regular” is a terrible term for this setting, as it really shouldn’t be used on the regular.
Permanent press: The medium-heat setting, with a cool-down period at the end designed to reduce wrinkling. This is the one you want for most of your clothes and for your sheets.
Delicate: The low-heat setting, which is sometimes obviously labeled “low-heat dry.” Use it for items containing Spandex or other forms of elastic, as well as for delicate cottons and shrink-prone materials like wools and linen. Low-heat drying is also great for garments that tend to retain smells even after washing, like yoga pants or sweat-wicking shirts.
Tumble dry: The no-heat setting, which is sometimes called “no heat” or “air dry.” It can be used in place of the delicate setting for fine textiles or items that are prone to shrinking, or for clothing with embellishments that may melt or warp due to exposure to heat.
Air and line drying: A great choice for deodorizing and brightening whites, keeping gym clothes odor-free, making clothes last longer, and cutting back on energy usage and cost.

The Best Washer/Dryer
LG WM3770HVA
This effective, efficient washing machine has some of the quickest and most versatile cycles, and it comes from a brand with a great track record for reliability.
Keeping Your Machines Running
They do a lot of the heavy lifting — make sure you are taking care of them, too.

Cleaning a Washing Machine
Cleaning a washer depends on how, and how often, the machine is used; a single professional woman who does one load of wash a week won’t need to clean her machine as often as the dad who is cloth diapering his offspring.
The process of cleaning a washer is fairly straightforward: Run an empty load using hot water and a cleaning agent in place of detergent to flush the machine. A toothbrush can also be helpful for removing product buildup from dispenser compartments. Commercial washing machine cleaners, from brands like Tide and Carbona, exist, but a specialty product isn’t required for the job — white vinegar is an excellent choice, as is baking soda. If you have a front-loading machine, after a cleaning cycle, wipe the gasket to avoid product buildup and the development of mildew.
Speaking of the gasket! If you have a high efficiency (HE) washer, the development of a mildew-y odor is likely. To keep it at bay, leave the door ajar when the machine is not in use, so that air can circulate and help to dry the machine out. When odors do develop, use a rag and white vinegar (wring it out so that it’s damp but not dripping) to wipe the gasket clean of lingering moisture, detergent residue, and the mildew that develops from the combination of the two. If you are an especially diligent person, go ahead and add a weekly or monthly wiping of the gasket to your laundry routine to keep the mildew at bay. Tip: While bleach can be used to eliminate mildew in a gasket or clean a washer, it’s not ideal because residue can damage clothes or irritate sensitive skin.
If running an empty load offends your thrifty or environmental sensibilities, go ahead and use the cleaning cycle to wash items like shower curtain liners or rags.

Dryer Safety
Dryer fires affect 2,900 homes a year according to the U.S. Fire Administration. You should be diligent about maintaining your dryer to prevent a disaster from happening. You should also follow these rules for using your dryer:
- Clean the lint filter after every use.
- The exhaust vent should be cleaned at least once a year.
- Never overload a dryer.
- Don’t leave a dryer running while you’re sleeping or out of the house.
The National Fire Prevention Association offers more helpful tips on dryer safety.
When and How to Hand-Wash
Sometimes a machine is not the best choice.

Hand-laundering has a bad reputation, which is a shame, because it really is a straightforward endeavor and a great skill to have. Whether you choose to hand-wash delicate garments like bras or cashmere sweaters as a regular part of your laundering routine, or you tuck the skill in your back pocket for use when traveling, here are the basic steps.
- Set-up
You don’t need much by way of supplies to hand-wash a garment: Laundry detergent, a clean towel and a space large enough to fully submerge the garment in water — such as the kitchen or utility sink, the bathtub, or a washing bucket — are all that are required.Make sure, however, that the place where you’ll be doing the washing is clean (a quick wipe-down with all purpose cleaner will do the trick); you won’t want to be hand-laundering your bras in the kitchen sink alongside remnants of last night’s dinner!Fill the sink (or tub, or bucket) with water, leaving enough headspace for both the garment and your hands to get in there and move things around. Then add a small amount of detergent — small being the operative word. A little detergent goes a long way, especially when it comes to hand-laundering; aim for a teaspoon to a tablespoon of detergent, depending on how large the load of hand-wash is. - Introduce the garment and mimic a washing machine
Place the garment into the detergent solution and, using your hands, submerge it fully. Then, move it about so that the detergent can penetrate the fibers. Think of how a washing machine operates using a combination of water, detergent and agitation — that’s what you’ll want to mimic in a hand-washing situation.Once the garment is submerged, allow it to soak in the solution. The amount of soaking time depends very much on what you’re washing, which is also true of the water temperature. Silks and cashmere should only be exposed to cool water for a short period of time, while sturdier fabrics like cottons can endure a longer soaking water. (See ‘The Ins and Outs of Fabric Care” for more on water temperature and specific fabrics.) - Rinsing
When it comes time to rinse, you’ll be thankful for your judiciousness with detergent during set-up — if you overused detergent, you’ll be rinsing for ages. Start by draining the detergent solution and wiping the sink free of sudsy residue, then refill the sink with clean water, agitate the garments to release soap, drain and repeat until the items no longer release detergent. You can also rinse sturdier fibers under running water, though delicate items like hosiery or fine scarves shouldn’t be placed directly under a running tap. - Drying
Once the sink has been drained for the final time, press down on the garment while still in the sink to extrude water; do not wring the fibers, which can cause stretching or breaks. Then, lay the garment on a clean, dry towel and roll it up as if you were making a terry cloth bûche de noel. The combination of pressing out water and rolling the item in a dry towel will leave the garment only damp, rather than dripping wet, leaving it ready to be hung or laid flat to air dry.

The Best Detergent for Hand Washing Clothes
Soak
A no-rinse whiz kid, Soak gently cleans with a minimum of handling and has an all-purpose formula that’s ideal for hand washing all your delicate garments.
The Ins and Outs of Fabric Care
Not all clothes are created equal — and knowing how they behave when wet will help you keep them beautiful.

Mastering your machines is only one part of becoming a Laundry Day champion. To really level up, you must understand how different fabrics — everything from gym clothes to fine woolen textiles — behave in the face of water, detergents, agitation and heat. Understanding how to use fabric content information will also largely free you from needing to interpret those inscrutable fabric care runes on the tags of your clothes.
Cotton is highly washable but can be prone to shrinking. Machine or hand wash cotton using cold water, and avoid exposure to hot water or high-heat drying. Fine cottons should be air dried.
Linen is highly washable but also prone to shrinking and wrinkling. Machine or hand wash linen using cold water, and air dry or press immediately after washing, while still damp, to eliminate wrinkles.
Nylon is also highly washable, but prone to static. Air drying will prevent static, so skip the dryer.
Polyester is highly machine washable and can be machine dried on medium- or low-heat.
Rayon and viscose are not highly washable. Always dry clean rayon and viscose clothes.
Silk is highly prone to color loss and to water staining. Silk, despite its water-averse reputation, can be hand-washed using cool water and a specialty detergent, or sent out for dry cleaning. If you opt to hand-wash silk, make it a very short operation, as silk doesn’t benefit from overexposure to water, and keep the water temperature consistent.
Spandex is machine washable, but it can hold onto odors, which means that it should be dried on a low-heat setting or air dried. Avoid the use of chlorine bleach with Spandex or with blends containing Spandex.
Wools, including cashmere and merino, are prone to felting and shrinking when washed. Felting, which is when woolen fibers become matted, occurs because of exposure to agitation and fluctuating water temperatures. Because of that, it’s best to hand wash woolens in cool water and allow them to air dry, flat. Wools can be machine washed, but should be placed in a mesh wash bag, and you should opt for cold water and the delicate cycle to reduce exposure to agitation. Air dry woolens.
Blends should be washed according to the instructions for the more sensitive fabric.
Separating the Wash
There was a bit of a spoiler in the section on machines, did you catch it? These days, virtually all of your laundry can be washed in cold water, which means that one of the big reasons for separating wash by color is outmoded. Because of that and because of trends in textiles (think athleisure), there is a different way to think about separating wash: By fabric type.
Taking the color of a garment out of the equation allows you to choose products and cycles that are best suited to the fabric types you’re washing. It also gives you more control over what fabric types are washed together, which is important because there are certain fabrics that really hate other fabrics.
The best example of this, to get back to our trends, is that athleisure and items like towels and fleece should not be laundered together because the latter are linty, and materials with stretch in them will retain lint cast off from other textiles.
Taking this example further, neither towels or athleisure should be washed or dried using fabric softener. In the case of towels, fabric softener (whether liquid or dryer sheets) leaves a coating that renders towels less absorbent. And the entire purpose of a towel is to absorb! Don’t rob them of their God-given ability to do their jobs. As for the athleisure, the coating is also the issue: It will trap smells, resulting in malodor that lingers even in clean workout clothes.
Still there are good reasons to separate the laundry by color, even if it will all be washed in cold water. The primary reason is to prevent fugitive dye (unstable dye that transfers, or bleeds, from fibers due to agitation or exposure to water or light) dry transfer from darks from turning lighter items dingy, or causing outright staining — think of the proverbial red sock that gets mixed in with a load of whites. The other reason is that there are laundry products, like ones that contain optical brighteners, that shouldn’t be used on darks because they will cause fading, but that are excellent when used on lights or whites.
If you do choose to mix whites and colors together in the same load, and dye runoff is a concern, toss into the wash a product like Carbona Color & Dirt Grabber or Shout Color Catcher.
Stain Removal 101
Stains are an unavoidable side effect of life — but with the right tools, they don’t have to stick around.

There are many, many good options when it comes to stain removal, and if we tried to catalogue every one of them, we’d be here all day. These are some of the best solutions and techniques to use with the most common stains that befoul our belongings.
Dingy and Sweat-Stained Whites
It’s tempting to reach for the bleach when a white tee or set of white sheets has gone yellow from age, sweat or the havoc that aluminum-containing antiperspirants wreak on the armpits of our shirts. But skip the bleach — or at least skip the chlorine stuff — and opt instead for oxygen bleach. Use it in addition to detergent to keep dinginess and staining at bay. When the inevitable dinginess brought on by age and wear occurs, dilute a large scoop in hot water and soak yellowed whites or lights for an hour up to overnight; then launder as usual.
Blood
There are a million (rough count) methods for removing blood stains, so here I’ll keep it to just a few: Hydrogen peroxide is one of the most common options, and it’s very good, but it’s critical that you test it in an inconspicuous place to ensure it won’t cause color loss.Unseasoned meat tenderizer (really!) diluted with water to form a paste is excellent on older, set-in blood stains. Salt water or saline solution is great on the fly because salt and water are pretty easy to find, even when you’re far from your laundry supplies. And in a pinch, saliva can work, if you can handle the gross-out factor.
Chocolate
Weird but true: Shout spray is incredible at removing chocolate stains. Spray a small amount on the stain, massage it using your fingers, and marvel as the stain dissolves.
Red Wine, Cranberry, Blueberry
I refer to this deadly trio of stains as “the reds,” which may not be exactly precise, since the stains are more purple than red, but “the purples” sounds too regal for stains that are so common. A product called Wine Away will make short work of removing not only red wine stains, but also those caused by cranberries and blueberries, whether whole, or in juice or sauce form.
Oil and Grease
If you catch a grease stain right as it happens, massage a small amount of diluted dish or hand soap into the spot using your fingers. For more stubborn stains, or ones you can’t get to straight away, dab a bit of Lestoil or Pine Sol onto the stains prior to laundering.
For especially bad grease stains, or for those that happen on materials that can’t be laundered or don’t love water (like silk or suede), reach for the corn starch. Yes, corn starch! The stuff you use to thicken pie filling is also amazing at absorbing grease.
To use it for stain removal, lay the garment flat on a surface where it can stay, undisturbed, for 12 to 48 hours, and pile an anthill-style mound of cornstarch on the stain and walk away. Then, brush the cornstarch away and check out the stain. It’s probably not there anymore! But if it is, and it’s lightened significantly, simply repeat the process to allow the cornstarch more absorbing time.
Ink
Ink is a funny animal in the stain kingdom: It’s one that does not necessarily benefit from immediate treatment. The problem with a fresh ink stain is that if you introduce any sort of liquid to it, there’s a risk of flooding the stain and making it spread. So be aware of that, but also be aware of this: Isopropyl alcohol (that’s the rubbing stuff) is aces on ink stains and is what you should reach for when a pen accidentally swipes your shirt or the kids hit the couch with their markers.
Odor Retention
Using the right washer and dryer settings can help reduce odor retention in clothes and items like towels, but sometimes you need something extra to eliminate smells like mildew or body odor. White vinegar works and is especially effective on towels, where it will also serve as a natural fabric softener.
To use it, add a half-to-a-full cup to the rinse cycle of the washing machine. While white vinegar also works quite well on athletic gear that’s retained a musty odor, over time the acid can break down the elasticity. Opting for a sports detergent, such as Tide Plus Febreze Sport, or a booster that’s used in concert with your regular detergent, like Tide Odor Rescue, will help to keep your favorite yoga pants or sweat-wicking shirt odor-free without breaking down the material.
Bonus: Lint and Pilling
In the course of both wearing and washing clothing, fibers can fray or break, leading to pilling. When that happens, reach for a de-pilling tool. While there are many options on the market, the Gleener is the one that I personally use and evangelize about to anyone who will listen. It offers three blades, which can be swapped out for use on very fine or very heavy textiles, and comes with a lint brush to remove fuzz or lint.

The Best Laundry Detergent
Tide Ultra Stain Release Free
Offering up a wicked stain-busting, odor-removing combo, this was the best all-purpose detergent.
Tips for Making Laundry Day Less Hideous
If you hate doing laundry, you’re not alone. But here are some ways to make laundry day less horrible.

Gathering a Load of Wash
There are all sorts of laundry disasters that can be averted if you take these steps every time you gather a load of wash.
Sort by color or fabric type: Sorting the laundry has to happen, and it’s a good place not to cut corners by performing a rush job. Sorting is the time when you can treat and prevent all kinds of problems, so make it a habit to practice your due diligence when sorting.
Check pockets: I want you to live in terror at the thought of a Chapstick going through the washer. I can help you treat the resulting stains if it happens, but it will require no small amount of effort on your part. The same goes for lipstick (rubbing alcohol), pen (also rubbing alcohol) or Laffy Taffy (yeah, someone asked me about that one —freezing is the trick, which also goes for gum removal). You can undo the damage, but wouldn’t it just be so much better if neither of us had to face that kind of mess?
Turn clothes inside out: Clothing that is prone to fading or odor retention will benefit from being washed inside out. Dark jeans, workout clothes and dark T-shirts should all be washed inside out.
Treat stains: Check clothing for stains or areas of soiling that should be addressed prior to laundering.

The Best Laundry Basket
The Container Store Stacking Laundry Basket
This basket’s simple design, light weight, and durability put it above the rest of the models we tested.
More Wirecutter laundry basket picks.
Folding and Putting Away Clothes
Here’s a hard truth that will make your life easier if you accept it: Putting clothes away is part of doing laundry. After all that gathering and sorting and stain treating and washing and drying and folding, it’s so tempting to set tidy piles of clothes down on top of your dresser, or on that corner chair that you secretly refer to as your “laundry chair.”
But resist that urge and take the two or so minutes (really!) to put the clothes away in their rightful place in drawers and closets. Here’s why: Those two minutes are far less time than you’ll use up during the week trying to find your favorite gym shirt or that pair of pants you want to wear to work on Wednesday in the mangled pile of once-folded laundry you’ve left on the laundry chair.
Also think about sorting by type before you begin folding. It might sound like it will add more time to folding, but it will save time in two ways: One, because you’ll fold faster when you fold like with like, and two, because then things are stacked together by category, which will make putting them away faster and easier.